Site Overview & Page Manager
A complete guide to the site management page — navigating tabs, managing pages, configuring SEO, and collaborating with your team.
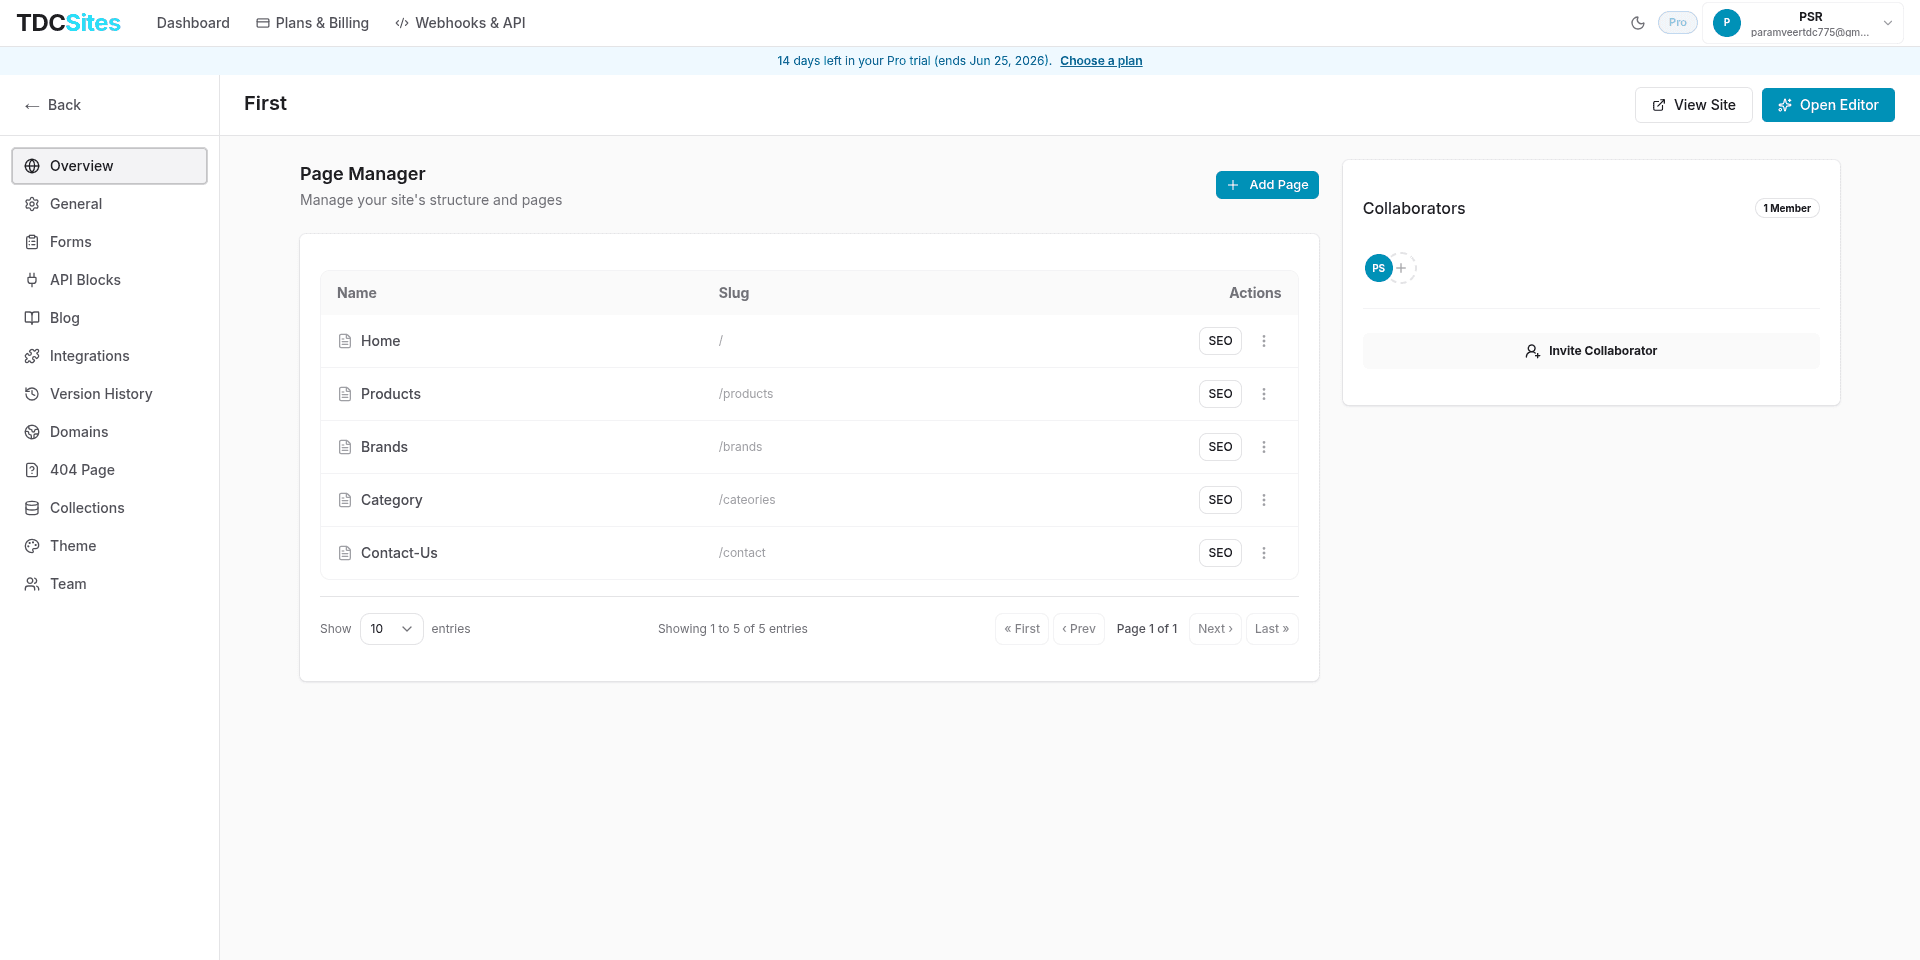
The Site Management Page is your control centre for a single site. Every tab on the left sidebar controls a distinct aspect of your site — from page structure and SEO to themes, blog, forms, and team access.

Reaching the Site Page
From the Dashboard, click any site card. You land on the Overview tab of that site's management page.
The top-right corner always shows two primary actions:
| Button | What it does |
|---|---|
| View Site | Opens your live published site in a new tab |
| Open Editor | Launches the visual block editor for this site |
Sidebar Navigation
The left sidebar lists every tab for this site. Each tab is a fully independent section:
| Tab | Purpose |
|---|---|
| Overview | Page Manager — create, edit, configure, and organise all pages |
| General | Site name, slug, favicons, SEO defaults |
| Forms | Form builder and submission inbox |
| API Blocks | Dynamic API-powered content blocks |
| Blog | Posts, authors, categories, tags |
| Integrations | GTM, GA4, Meta Pixel, custom scripts |
| Version History | Restore any previously published page version |
| Domains | Subdomain management and custom domain setup |
| 404 Page | Customise the page visitors see on broken links |
| Collections | CMS structured data collections |
| Theme | Site-wide colors, typography, and design tokens |
| Team | Invite collaborators and manage site-level roles |
Page Manager
The Overview tab is the Page Manager. It shows every page in your site in a clean table view.
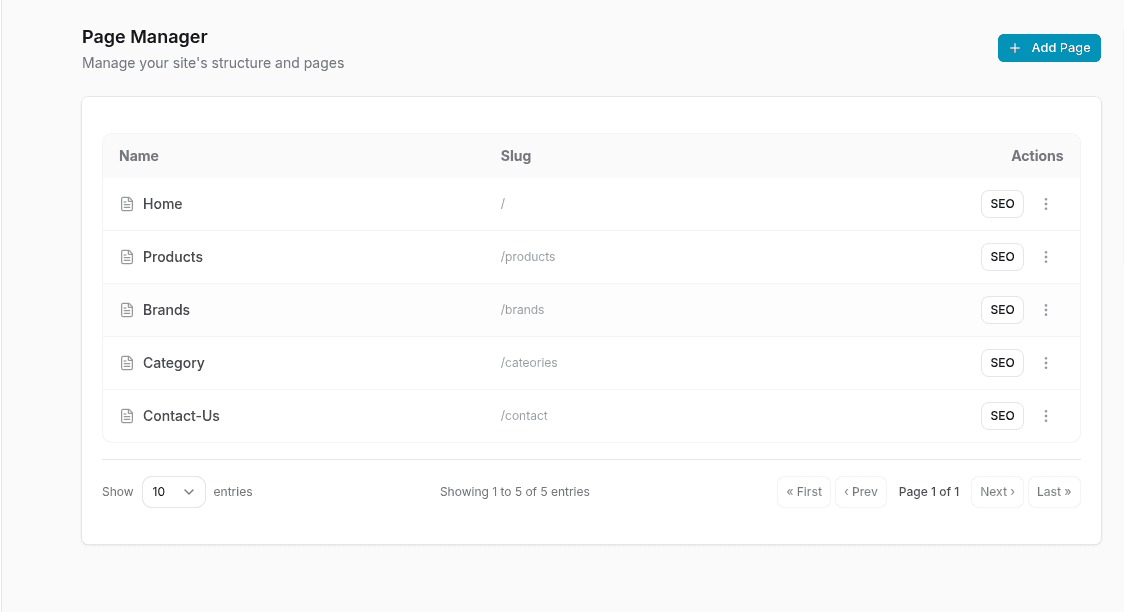

Table Columns
| Column | Description |
|---|---|
| Name | The page's display name — visible in your dashboard and browser tab |
| Slug | The URL path for this page (e.g., /about, /services) |
| Actions | Per-page action buttons — SEO settings and a three-dot menu (edit,duplicate,delete) |
Pagination Controls
At the bottom of the table you can control how many entries are shown at once (default: 10). Navigation buttons — First, Prev, Page X of Y, Next, Last — let you browse across pages when you have many entries.
Adding a New Page
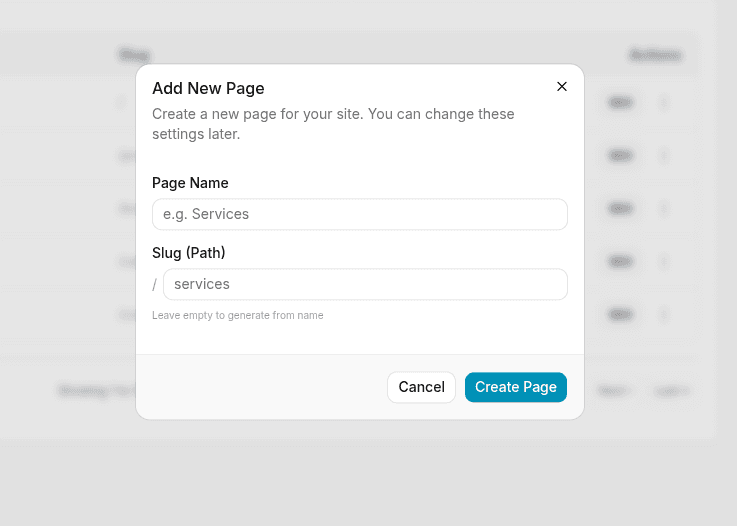
Click + Add Page in the top-right of the Page Manager to open the Add New Page dialog.

Fields
| Field | Description |
|---|---|
| Page Name | The human-readable name for the page (e.g., "Services", "About Us") |
| Slug (Path) | The URL segment after your domain (e.g., /services). Leave empty to auto-generate from the page name. |
The slug is generated automatically as you type the page name. You can customise it before clicking Create Page, but you cannot change the slug for the Home page (/).
Steps
Click + Add Page in the Page Manager header.
Type your Page Name — the slug fills in automatically below it.
Optionally edit the Slug to a custom path.
Click Create Page. The page appears in the table immediately.
The new page starts as a blank canvas. Open it in the editor to add sections and blocks.
Editing a Page
Click the three-dot menu (⋮) next to any page and select Edit, or click directly on the page name row.


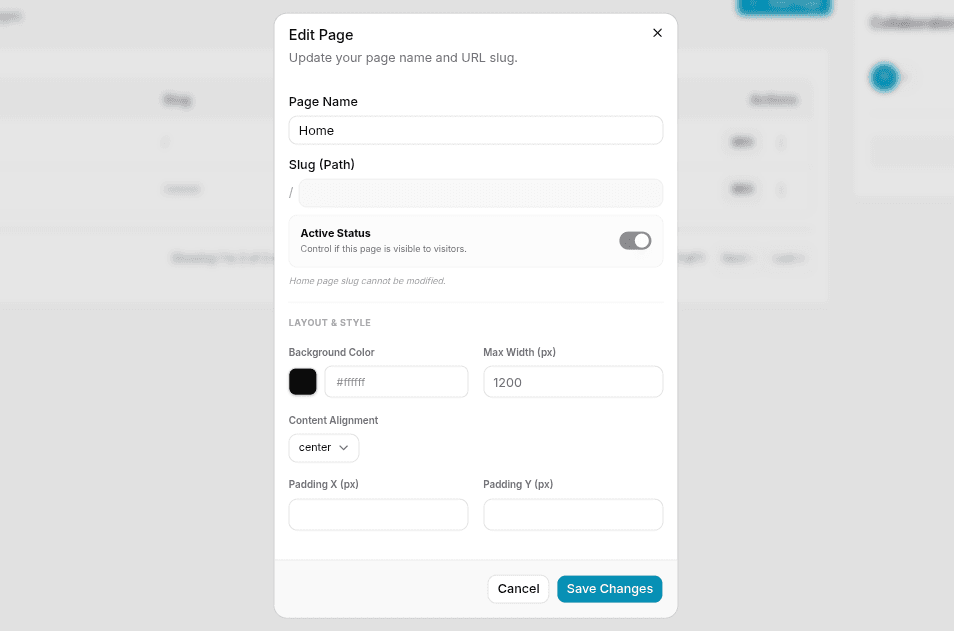
This opens the Edit Page dialog.

Page Settings
| Field | Description |
|---|---|
| Page Name | The display name of the page. Renaming does not change the slug. |
| Slug (Path) | The URL path for this page. Must be unique across the site. The home page slug (/) cannot be modified. |
| Active Status | When on, the page is publicly accessible. When off, visiting the URL returns a 404 even if the page has published content. Use this to stage a page before making it live. |
| Field | Description |
|---|---|
| Background Color | Sets the default canvas background color for this page. Accepts any valid hex value (e.g., #000000). Individual sections can override this. |
| Max Width (px) | The maximum content width in pixels (e.g., 1200). Content wider than this is centred and padded. |
| Content Alignment | Controls horizontal alignment of content within the max-width container. Options: left, center, right. |
| Padding X (px) | Left and right padding applied to the entire page canvas. |
| Padding Y (px) | Top and bottom padding applied to the entire page canvas. |
Click Save Changes to apply. Changes take effect on next publish.
Layout & Style settings set defaults for the page canvas. Individual sections you add in the editor can override background color, width, and padding independently.
Duplicating a Page
Open the three-dot menu (⋮) → Duplicate.
A new page is created with:
- The same name suffixed with
(Copy) - A new unique slug (e.g.,
/about-copy) - All sections, blocks, and content identical to the original
The duplicate starts as a draft — it inherits the original's content but has no published version. You must open it in the editor and publish to make it live.
Common use case: Duplicate a landing page template to create a new variant without building from scratch.
Deleting a Page
Open the three-dot menu (⋮) → Delete.
A confirmation dialog appears. Confirm to permanently remove the page and all its published versions.
Deletion is permanent. There is no recycle bin. If you want to hide a page temporarily, use the Active Status toggle in Edit Page instead — the page remains in your dashboard but becomes inaccessible to visitors.
Per-Page SEO Settings
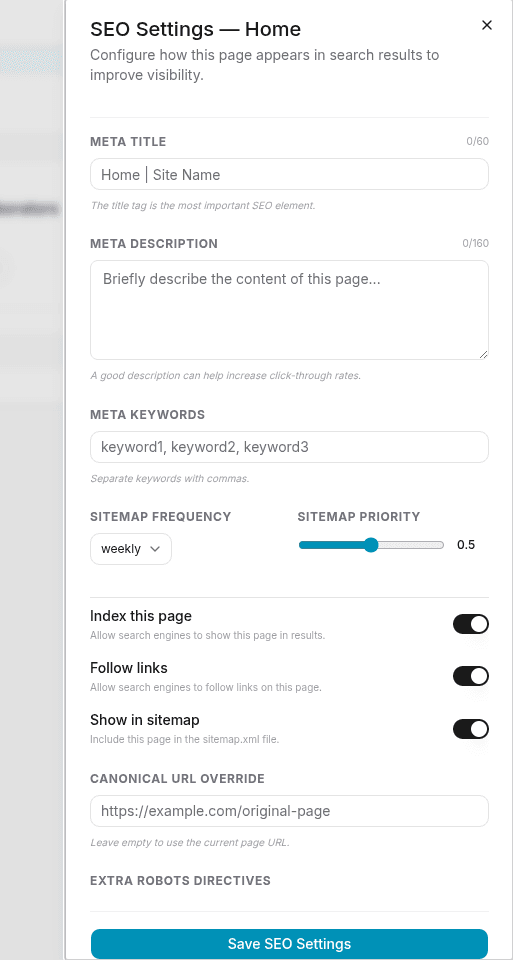
Click the SEO button on any page row to open the SEO Settings side panel. This slides in from the right without leaving the Page Manager.

SEO Fields Reference
| Field | Limit | Description |
|---|---|---|
| Meta Title | 80 chars | The <title> tag in the browser tab and search result headline. If empty, defaults to the page name. Best practice: Include your brand name (e.g., Home | Site Name). |
| Meta Description | 160 chars | The snippet shown under your title in search results. Aim for 120–160 characters. A good description directly influences click-through rate. |
| Meta Keywords | — | Comma-separated keywords (e.g., keyword1, keyword2, keyword3). Less important for modern SEO but useful for internal categorisation. |
| Setting | Default | Description |
|---|---|---|
| Index this page | On | Tells search engines to include this page in results. Turn off for thank-you pages, admin utilities, or pages under construction. |
| Follow links | On | Tells search engine crawlers to follow outbound links on this page. Turn off to prevent link equity passing to external sites. |
| Show in sitemap | On | Includes this page in the auto-generated sitemap.xml. The sitemap is submitted to Google Search Console to ensure pages are discovered. |
| Sitemap Frequency | Weekly | How often search engines should re-crawl this page. Options: always, hourly, daily, weekly, monthly, yearly, never. |
| Sitemap Priority | 0.5 | Relative importance of this page vs. other pages on the site. Range: 0.0 (lowest) to 1.0 (highest). Set your homepage to 1.0. |
| Field | Description |
|---|---|
| Canonical URL Override | If this content exists elsewhere (e.g., you're cross-posting), enter the original URL here. This tells search engines which version to index, preventing duplicate content penalties. Leave empty to use the current page URL. |
| Extra Robots Directives | Additional meta-robots instructions (e.g., noarchive, noimageindex). Advanced use only — consult SEO documentation before setting these. |
Click Save SEO Settings at the bottom of the panel to apply.
SEO metadata is embedded into the page's <head> on the next publish. Changes made here are not live until you open the editor and publish that page.
SEO Best Practices
| Page Type | Recommended Settings |
|---|---|
| Homepage | Priority 1.0, frequency daily, indexed + in sitemap |
| Blog posts | Priority 0.7, frequency weekly, unique meta description per post |
| Thank-you / confirmation | noindex, exclude from sitemap |
| Duplicate/variant pages | Set canonical URL to the primary version |
Collaborators Panel
The right side of the Overview tab shows the Collaborators panel — a quick view of who has access to this site.
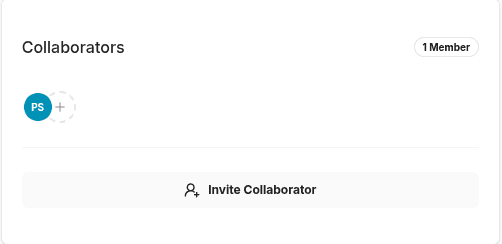

- Member avatars — Each circle represents a team member with site access. Hover to see their name.
- + icon — Click to quickly invite a new collaborator.
- Member count — Shows the total number of members with access to this site.
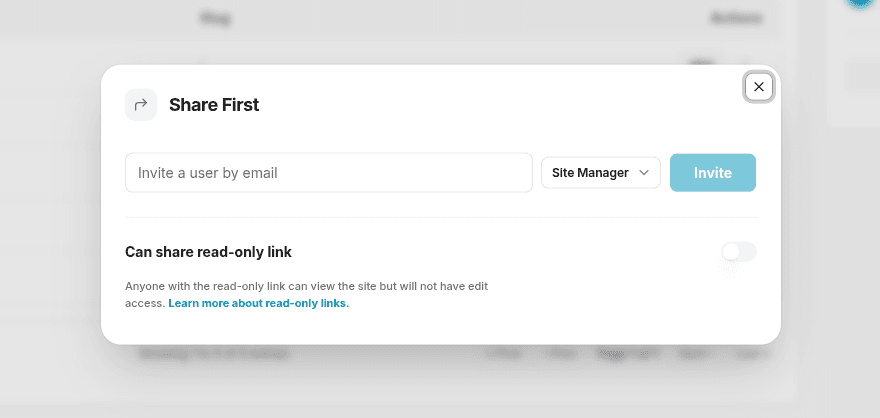
Inviting a Collaborator (Share Dialog)
Click Invite Collaborator (or the + icon) to open the Share dialog.

Role Options
| Role | What they can do |
|---|---|
| Site Manager | Full site control — edit pages, change settings, manage team, configure domains |
| Site Designer | Edit page layouts, sections, blocks, and theme — cannot change site settings or manage team |
| Site Content Editor | Edit text and media content inside existing sections — cannot restructure layouts |
| Site Viewer | Read-only access — can view pages and settings but cannot make any changes |
Invite by Email
- Enter the collaborator's email address in the invite field.
- Select their role from the dropdown.
- Click Invite.
The person receives an email with a link to accept the invitation. Once accepted, they appear in the Collaborators panel.
Read-only Link
Toggle Can share read-only link to generate a shareable URL. Anyone with this link can view the site and its pages without being able to edit anything. Useful for client reviews or stakeholder previews.
Read-only link recipients do not need a TDC account. They can open the link in any browser and browse the site structure without logging in.
Quick Actions Reference
From the Page Manager, here is the full list of actions available per page:
| Action | How to access | Effect |
|---|---|---|
| Open in Editor | Click page name or Open Editor button | Launches the visual editor for this page |
| SEO Settings | Click SEO button in the Actions column | Opens the SEO side panel |
| Edit Page | Three-dot menu → Edit | Opens the Edit Page dialog |
| Duplicate | Three-dot menu → Duplicate | Creates an identical copy as a draft |
| Delete | Three-dot menu → Delete | Permanently removes the page and all versions |
| Toggle Visibility | Edit Page → Active Status toggle | Hides or shows the page without deleting it |
What Happens When You Publish
Edits made in the Page Manager (name, slug, active status, SEO, layout settings) are stored immediately when you click Save. However, they don't affect the live site until the page is published from the editor.
The publish cycle:
Edit settings → Save → Open Editor → Publish → Changes are liveSee Publishing for a full walkthrough of the publish flow, version history, and restoring previous versions.