Dashboard Overview
Navigate the main dashboard — your central hub for managing workspaces, sites, and team members.
The dashboard is your starting point after logging in. From here you manage all your workspaces, sites, and team members.

Workspace Switcher
The workspace switcher sits in the top-left corner of every dashboard page. It shows your currently active workspace.
Click it to open a dropdown that lists every workspace you belong to. A checkmark marks the active one.
A default workspace is created automatically when you register. You don't need to create one manually.
Creating a New Workspace
- Click the workspace switcher.
- Select Add New Workspace at the bottom of the dropdown.
- Enter a Workspace Name (minimum 2 characters).
- Click Create Workspace.
The new workspace becomes active immediately and your browser remembers the last selected workspace across sessions.
Dashboard Tabs
The main dashboard has three tabs:
Sites Tab
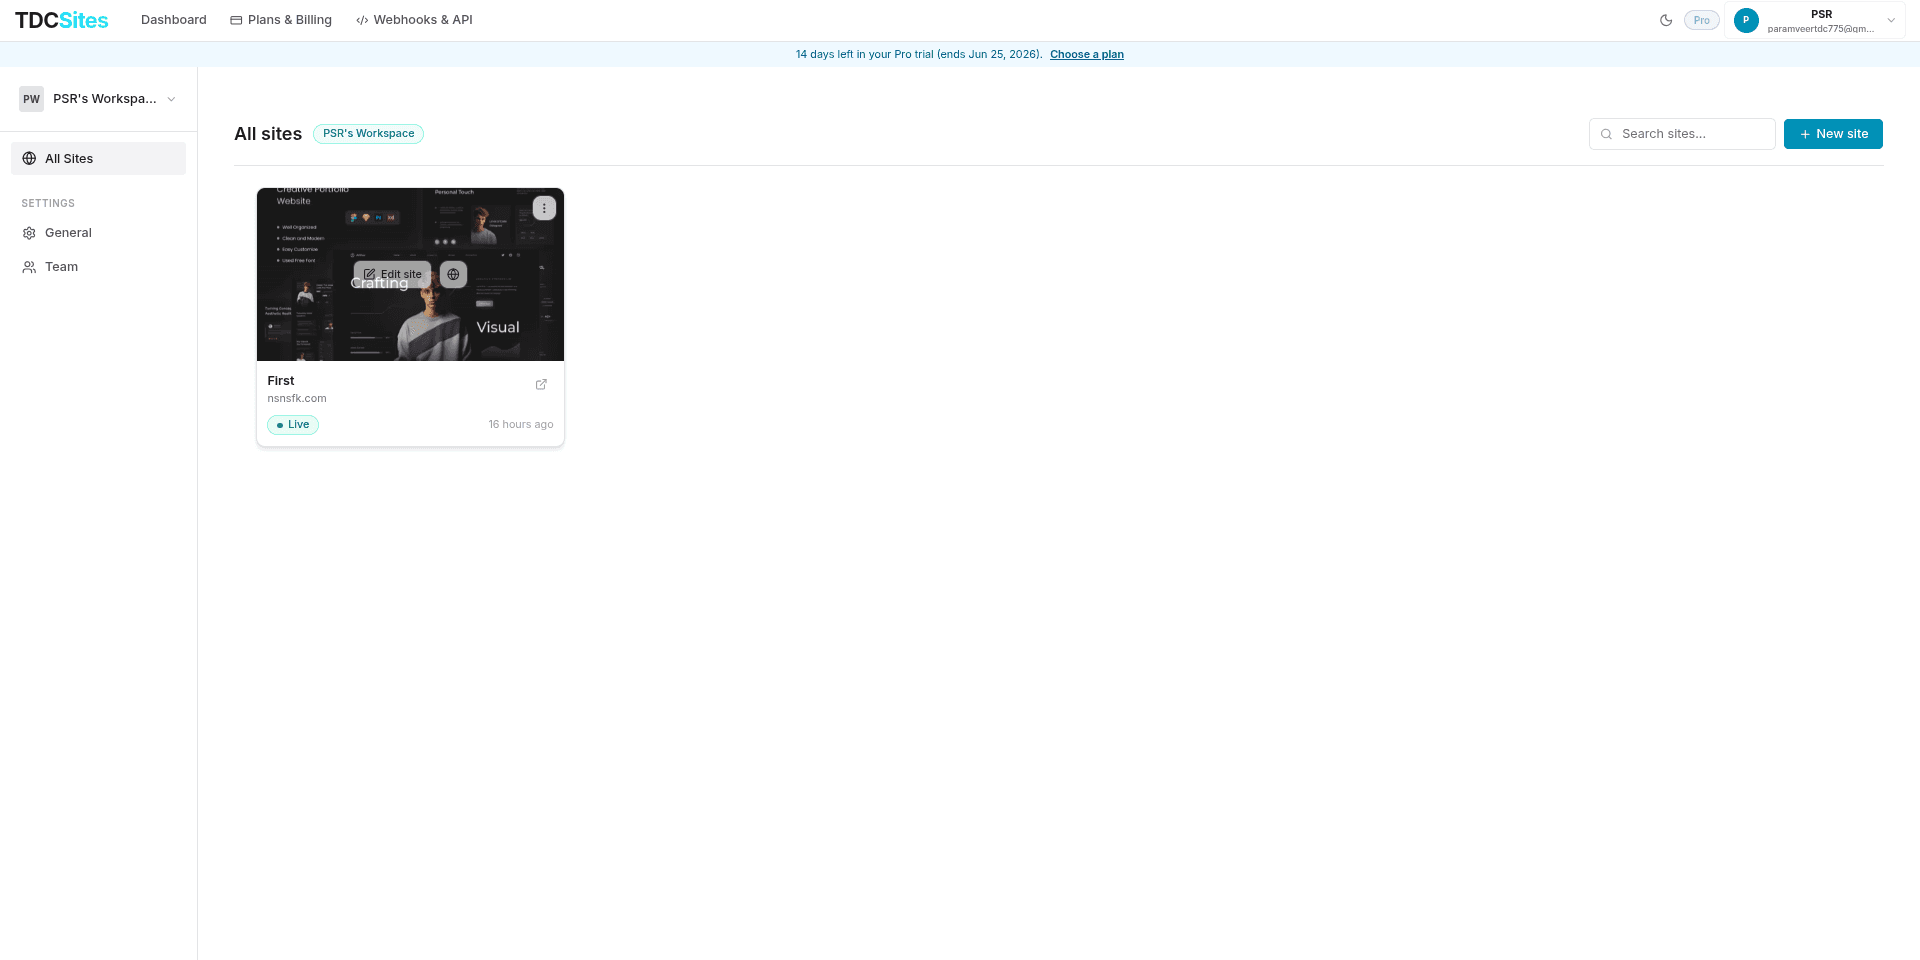
The default view. Shows all sites in the current workspace.
Each site card displays:
- Site name
- Domain (custom domain, subdomain, or local preview URL)
- Status badge — Live, Draft, or Archived
- When it was last edited
Searching sites — Use the search bar to filter by name. Results update as you type.
Pagination — The first 10 sites are shown. Click Show all to expand.
Creating a site — Click + New Site, enter a name, and click Create. You're taken directly to the site's settings page.
General Settings Tab
Configure workspace-level settings:
| Setting | Description |
|---|---|
| Workspace Name | The display name for this workspace |
| Default Workspace | If enabled, this workspace is selected automatically on every login |
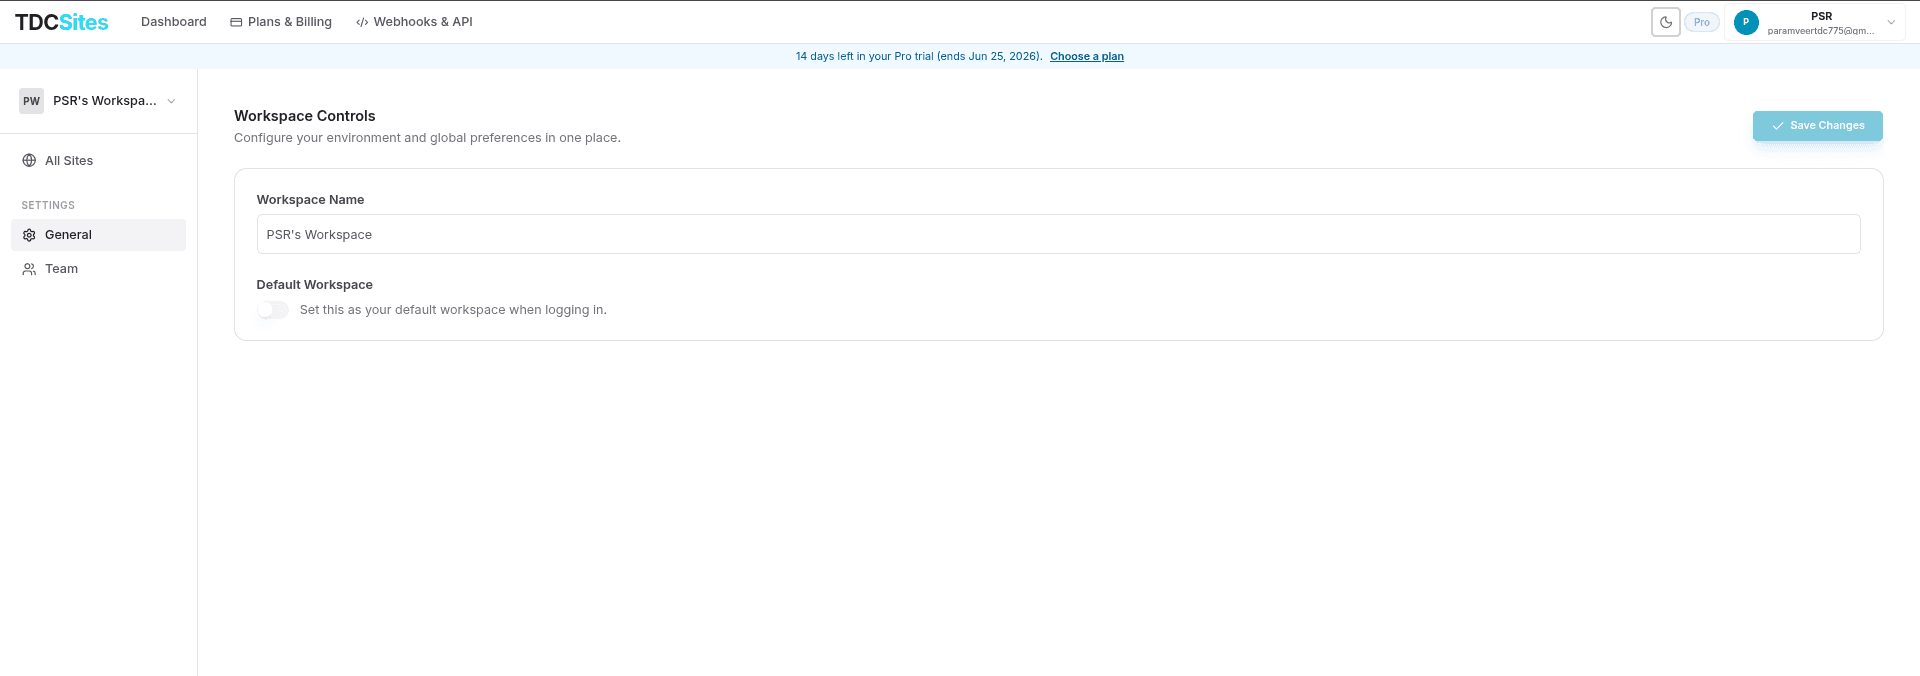

Click Save Changes to apply.
Deleting a Workspace
Deleting a workspace permanently removes all sites, pages, and data inside it. This cannot be undone.
Only the workspace owner can delete it. A Danger Zone section appears at the bottom. Click Delete workspace, type the workspace name to confirm, then click the red Delete workspace button.
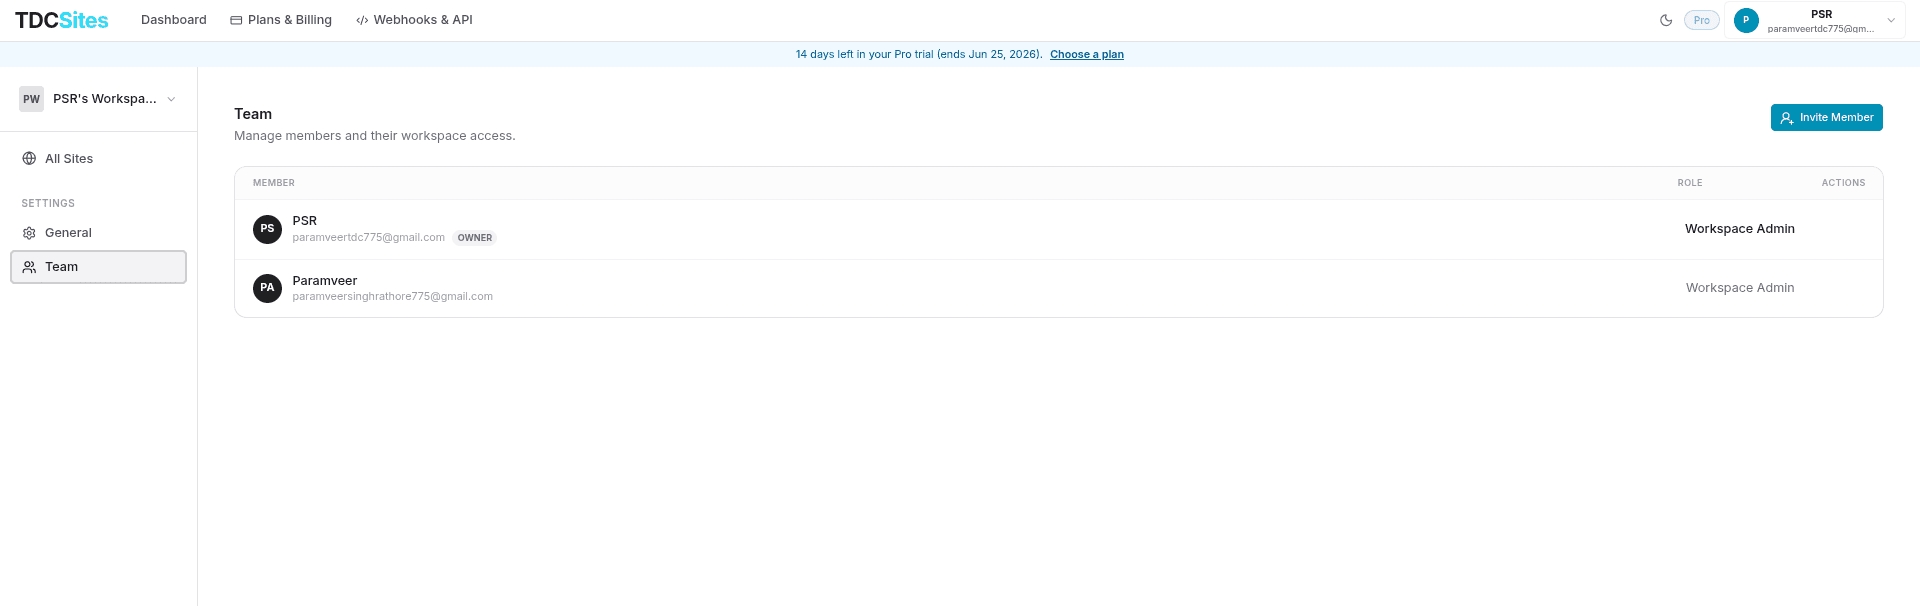
Team Tab
Invite people to your workspace and manage existing members.

Inviting Members
- Click Invite members.
- Enter the person's email address (or switch to link-based invite).
- Select their Role.
- Choose whether to give them access to all sites or specific ones.
- Click Send Invitation.
The person receives an email with a link to accept. Until they accept, the invite appears in the Pending Invitations section.
Link-based Invites
Toggle to link-based invite to generate a shareable URL instead of sending an email. Anyone with the link can join. Click the copy button to copy the link.
Managing Members
For each member you can:
- Change their role — Use the role dropdown next to their name.
- Remove them — Open the three-dot menu and click Remove.
Cancelling a Pending Invite
In the Pending Invitations section, click the X (close/cancel) button at the right end of the invite you want to withdraw.
Account & Profile
Click your avatar or name in the top-right corner of the header, then select Profile to access your account settings. From there you can:
- Update your name and email
- Change your password
- Enable two-factor authentication
- Register a passkey
- Manage API keys
- View billing and plans
- Delete your account
See the Billing and Developer sections for details on those areas.