Integrations & Custom Scripts
Connect Google Tag Manager, Google Analytics 4, Meta Pixel, and inject custom headers/footers scripts across your pages.
TDC Site Builder provides a built-in integration suite to inject tracking codes, analytics engines, ad pixels, chat widgets, and custom scripts into your website without editing code templates directly.
Overview
You can access the integration management panel by selecting the Integrations tab in the Left Sidebar of your Site Management page. The page is divided into two sections: Third-Party Integrations (Google Tag Manager, Google Analytics 4, Meta Pixel) and Custom Scripts (Header/Footer injections).
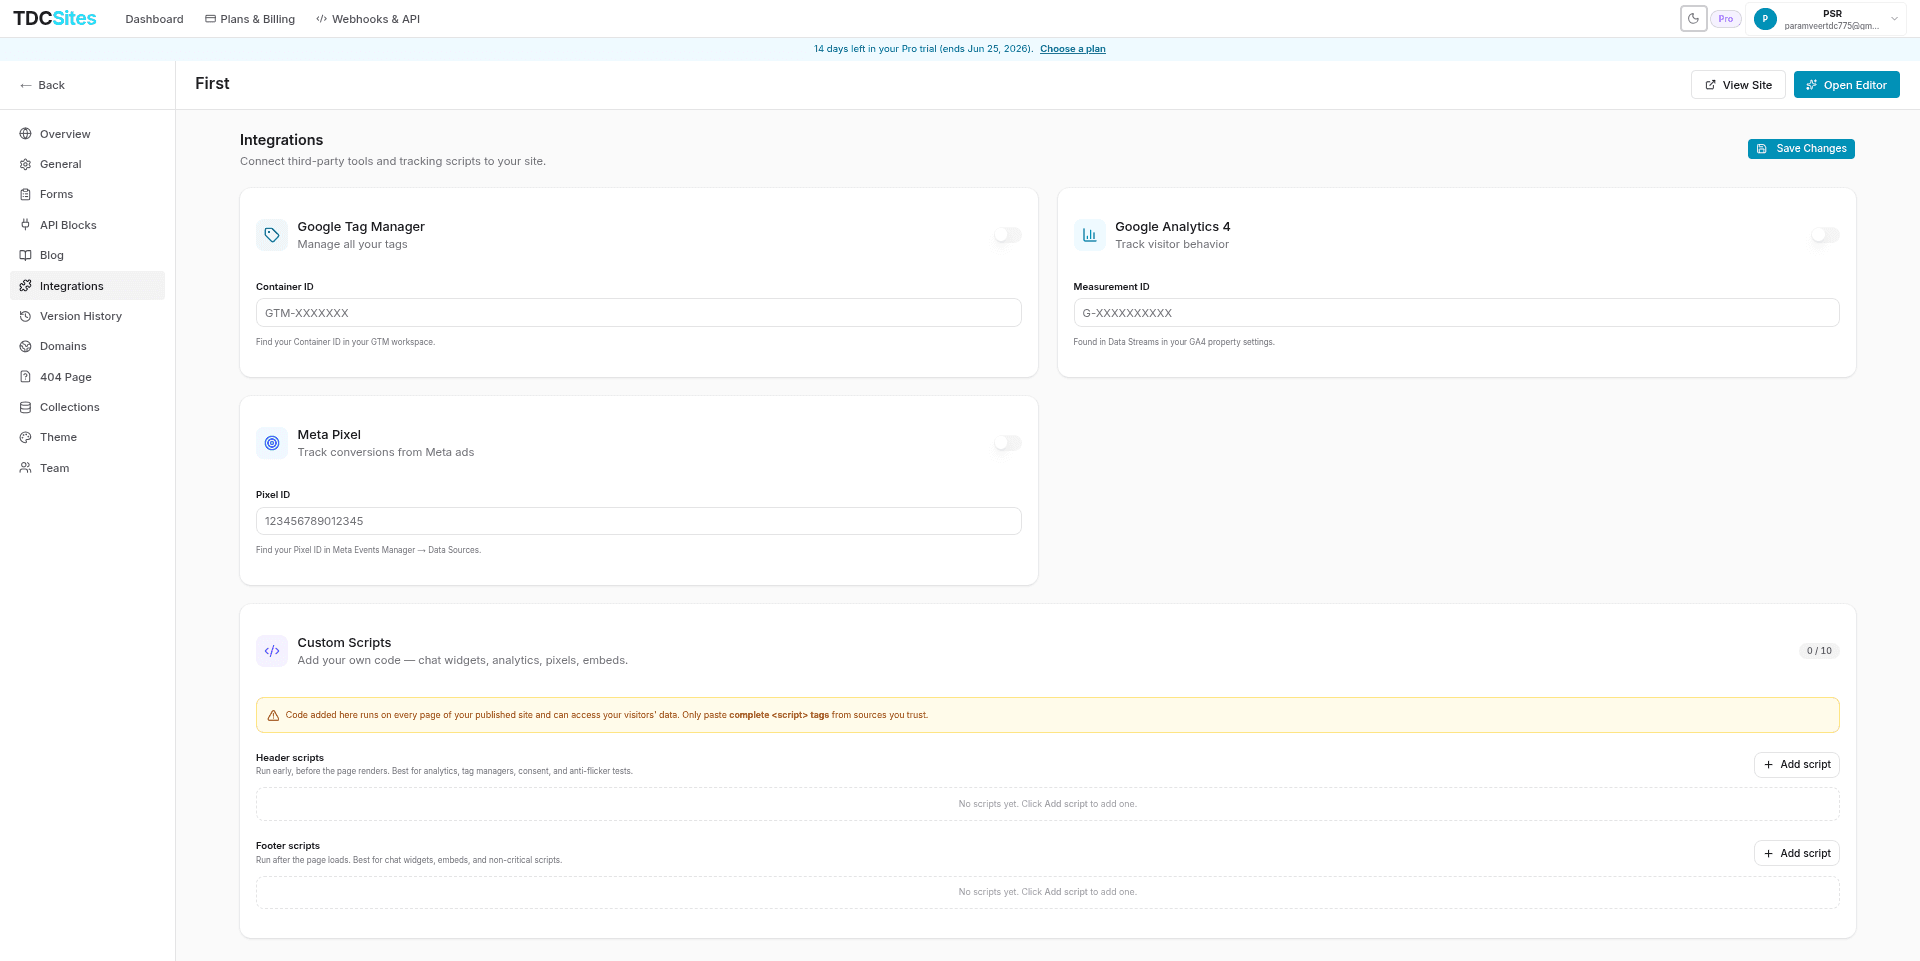

Third-Party Integrations
We support direct integrations with major analytics and advertising platforms:
1. Google Tag Manager (GTM)
GTM allows you to deploy and manage marketing tags without rewriting site code.
- Container ID: Paste your GTM container ID (formatted as
GTM-XXXXXXX). - Injection: Injects GTM tags correctly at the top of both the
<head>and the<body>on every page of your published site.
2. Google Analytics 4 (GA4)
GA4 tracks visitor engagement, acquisition sources, and page conversion metrics.
- Measurement ID: Paste your measurement ID (formatted as
G-XXXXXXXXXX). - Location: Found inside your Google Analytics Admin panel under Data Streams -> Web Stream Details.
3. Meta Pixel
Meta Pixel tracks visitor conversions originating from ads on Facebook and Instagram.
- Pixel ID: Enters your 15–16 digit numeric identifier.
- Validation: Enforces strict 15–16 digit numeric checks. If invalid, a red warning highlights to prevent publishing broken trackers.
- Location: Found in Meta Events Manager under Data Sources.
[!NOTE] Basic Analytics Access: Google Tag Manager, Google Analytics 4, and Meta Pixel integrations require a plan tier that includes the Basic Analytics feature. If locked, you can upgrade your plan directly in your Profile's Plans tab to unlock them.
Custom Scripts
For tags not supported natively (e.g., Hotjar, Intercom, custom CSS styles, cookie banners), you can use the Custom Scripts card.
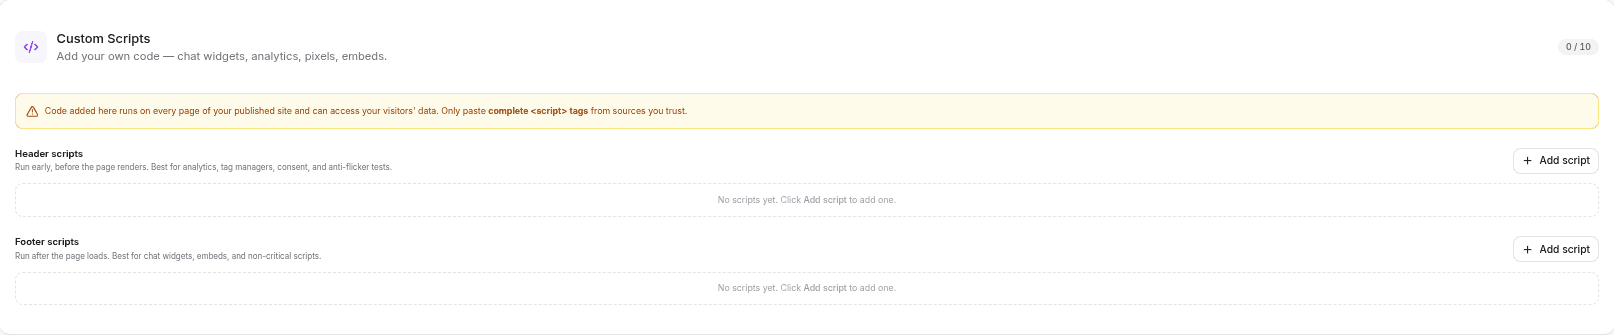

Script Injection Locations
You can choose where scripts are injected relative to the page rendering cycle:
- Header Scripts (
<head>):- Behavior: Injected into the document
<head>and run early before the DOM elements render. - Best For: Cookie consent popups, tag managers, font styles, anti-flicker tests, and critical telemetry scripts.
- Behavior: Injected into the document
- Footer Scripts (
<body>footer):- Behavior: Injected right before the closing
</body>tag and execute after page rendering. - Best For: Chat widgets (Intercom, Crisp), non-essential analytics, payment widgets, and custom page widgets.
- Behavior: Injected right before the closing
Creating & Configuring Scripts
For both Header and Footer sections, click + Add script to configure a script snippet:
- Script Name: An optional descriptive label (e.g.,
Intercom Chat Widget) to help you identify the block in your list. - Code Block: Paste the complete
<script>tag structure (e.g.,<script src="..."></script>or<script>console.log("hello")</script>).
[!WARNING] Security Reminder: Scripts run globally across every page of your published website. Only paste code from trustworthy sources, as scripts have full access to cookies, localStorage, and visitor interaction events.
Quota & Plan Limits
- Quota Limit: The number of custom scripts you can add is governed by your workspace plan. The current usage is displayed in a badge at the top-right of the card (e.g.
2 / 5). - Reaching Limits: When the script limit is reached, the Add script buttons are disabled.
- Downgrades & Inactivity: If your plan is downgraded and the Custom Scripts feature is locked, your existing script entries are kept in a read-only list but will not be injected into your pages. You can remove inactive scripts to align with limits or upgrade your plan to reactivate them.
Deploying Your Changes
Integrations and custom scripts are not deployed to production immediately when you click Save Changes. To make your updated integrations live:
- Make your edits in the Integrations panel.
- Click Save Changes at the top right of the screen.
- Open the Page Editor and click Publish to build and push the updated scripts to your public web domain.