Blog
Publish and manage blog posts with a built-in editor, tags, authors, and RSS feed.
Every site includes a built-in Blog system. TDC Site Builder handles post writing, rich-text formatting, categories, tags, author bio cards, and automatically generates live /blog routes and an RSS feed for you.
Overview
The Blog Dashboard is a headless content management system (CMS) built directly into your website management interface. It allows you to write long-form articles in a rich-text block editor, organize your posts with categories and tags, attribute them to custom author profiles, and customize SEO parameters per post.
The Blog Dashboard Tabs
In your site's management page, select the Blog tab in the left sidebar. The interface is organized into four tabs:
1. Posts Tab
This is your primary blog dashboard, showing a list of all your articles.
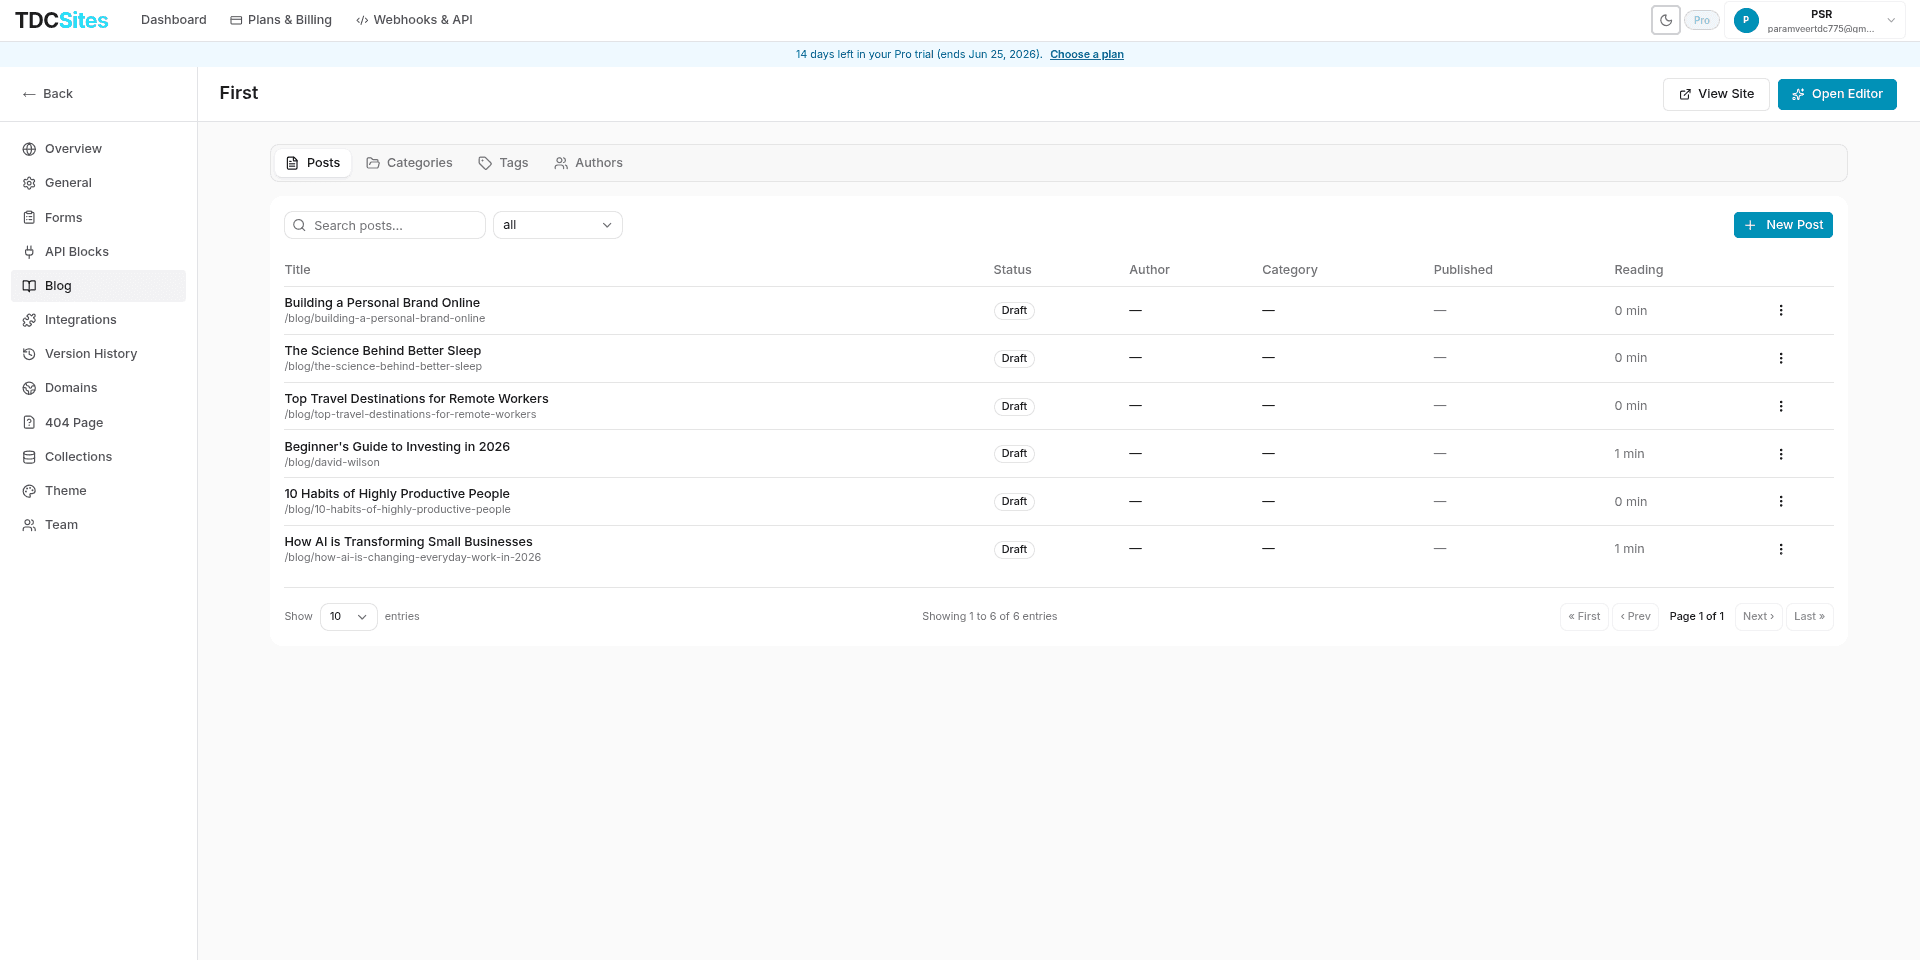

- Search: Locate posts instantly by title.
- Status Filter: Filter list entries by status (All, Draft, Published, Archived).
- Posts Table: Displays Title (with URL path), Status Badge, Author, Category, Published Date, and Reading Time.
- Actions Menu (⋮): Quick options to Edit, Publish/Unpublish, Duplicate, or Delete a post.
2. Categories Tab
Categories represent the primary high-level topics for your blog. Each post belongs to exactly one category.
- Click + New Category to add a category name, custom slug, and optional description.
- Use the edit and trash icons to modify or delete categories. When a category is deleted, its associated posts are preserved but marked as uncategorized.
3. Tags Tab
Tags are cross-cutting labels that describe specific subjects. A post can have multiple tags associated with it.
- Click + New Tag to create custom tags.
- The tag list displays the tag name along with a counter showing how many posts currently utilize it.
4. Authors Tab
Create profiles for writers independently of your dashboard team collaborators.
- Click + New Author to create an author bio card.
- Author Fields: Display Name, custom slug (e.g.
john-doe), biography bio text, Email, and social links (Twitter/X, LinkedIn, and Personal Website). - Linking an author automatically displays their name, bio, and social links on the public article page.
Creating a Blog Post
To start a new blog post:
In the Blog -> Posts tab, click the + New Post button in the top-right corner.
In the dialog, enter the Post Title. An URL-safe slug is generated automatically based on your title (you can override it with a custom path).
Click Create draft. You are immediately redirected to the dedicated Rich Text Blog Editor.
Using the Rich Text Blog Editor
The Blog Editor features a clean canvas with a side settings panel designed for focused writing and formatting.


Writing Content
- Markdown Shortcuts: Type common Markdown markers (like
##for a Heading,*for bullet points, or>for Blockquotes) and watch them instantly convert into rich blocks. - Media Ingestion: Hover on the left margin of a blank line to insert images using the built-in site Asset Picker.
- JSON Mode: For developers, toggle the code tab to preview the raw JSON block structure.
Settings Panel (Right Sidebar)
Use the panel on the right to configure classification and display options:
| Configuration | Description |
|---|---|
| Author | Select an author profile from the dropdown to attribute the post. |
| Category | Assign the post to a defined category to group it. |
| Tags | Click on tag badges to toggle and link multiple tags to the article. |
| Cover Image | Pick or upload a high-resolution cover image using the Asset Picker. |
| Display Toggles | Toggle visibility parameters on the public post page for: Cover Image, Author byline, Published date, Reading time, and Tags. |
SEO & Custom Metadata
At the bottom of the editor, the SEO & Metadata card lets you optimize search visibility and social graphics for the article:
- Meta Title & Description: Customize the search engine title (80 character limit) and preview snippet (160 character limit). Defaults to the post title and excerpt.
- OG Image URL: Specify a custom Open Graph image for preview cards on social networks (Facebook, Twitter, Slack, etc.).
- Canonical URL: Enter a canonical link if this post is cross-posted from another website.
- Exclude from Search (noindex): Toggle to prevent web crawlers from indexing this post.
Publishing Workflow
TDC Site Builder uses a precise publishing lifecycle to prevent accidental edits from going live:
- Save: Saves your changes in the editor.
- Snapshot Draft: Saves a static snapshot of your current draft for previewing or staging.
- Publish: Compiles the draft. The status updates to
Published, and the post instantly becomes accessible on the public/blog/[slug]route and appears on the main/blogfeed. - Unpublish: Reverts the post status back to
Draft. The post is immediately removed from the live site and RSS feed.
RSS Feed & Public Routes
TDC automatically serves your blog pages and feeds dynamically:
- Blog Index: Served at
/blog(displays the list of published posts, excerpt snippets, read times, and cover images). - Post Pages: Served at
/blog/[slug]. - RSS Feed: Generated automatically at
/blog/rss.xml. Whenever you publish, update, or unpublish posts, the RSS feed is regenerated to notify subscribers and feed readers.